Understanding the Details of Rear Roof Termination on Flat Roofs
This past week we looked at a particular modified bitumen low slope roof rear termination where plates and screw type fasteners were used to secure the end of the modified bitumen roof membrane. This week we’re going to look at an example of that again, shown in the picture below. Here you can see, that these plates are, although not technically correct, doing an okay job to secure the edge of the membrane. Today we’re also going to look at some other examples of rear modified bitumen roof terminations where the membrane is completely loose and disconnected. Those cases are even worse than the one shown last week and here below.

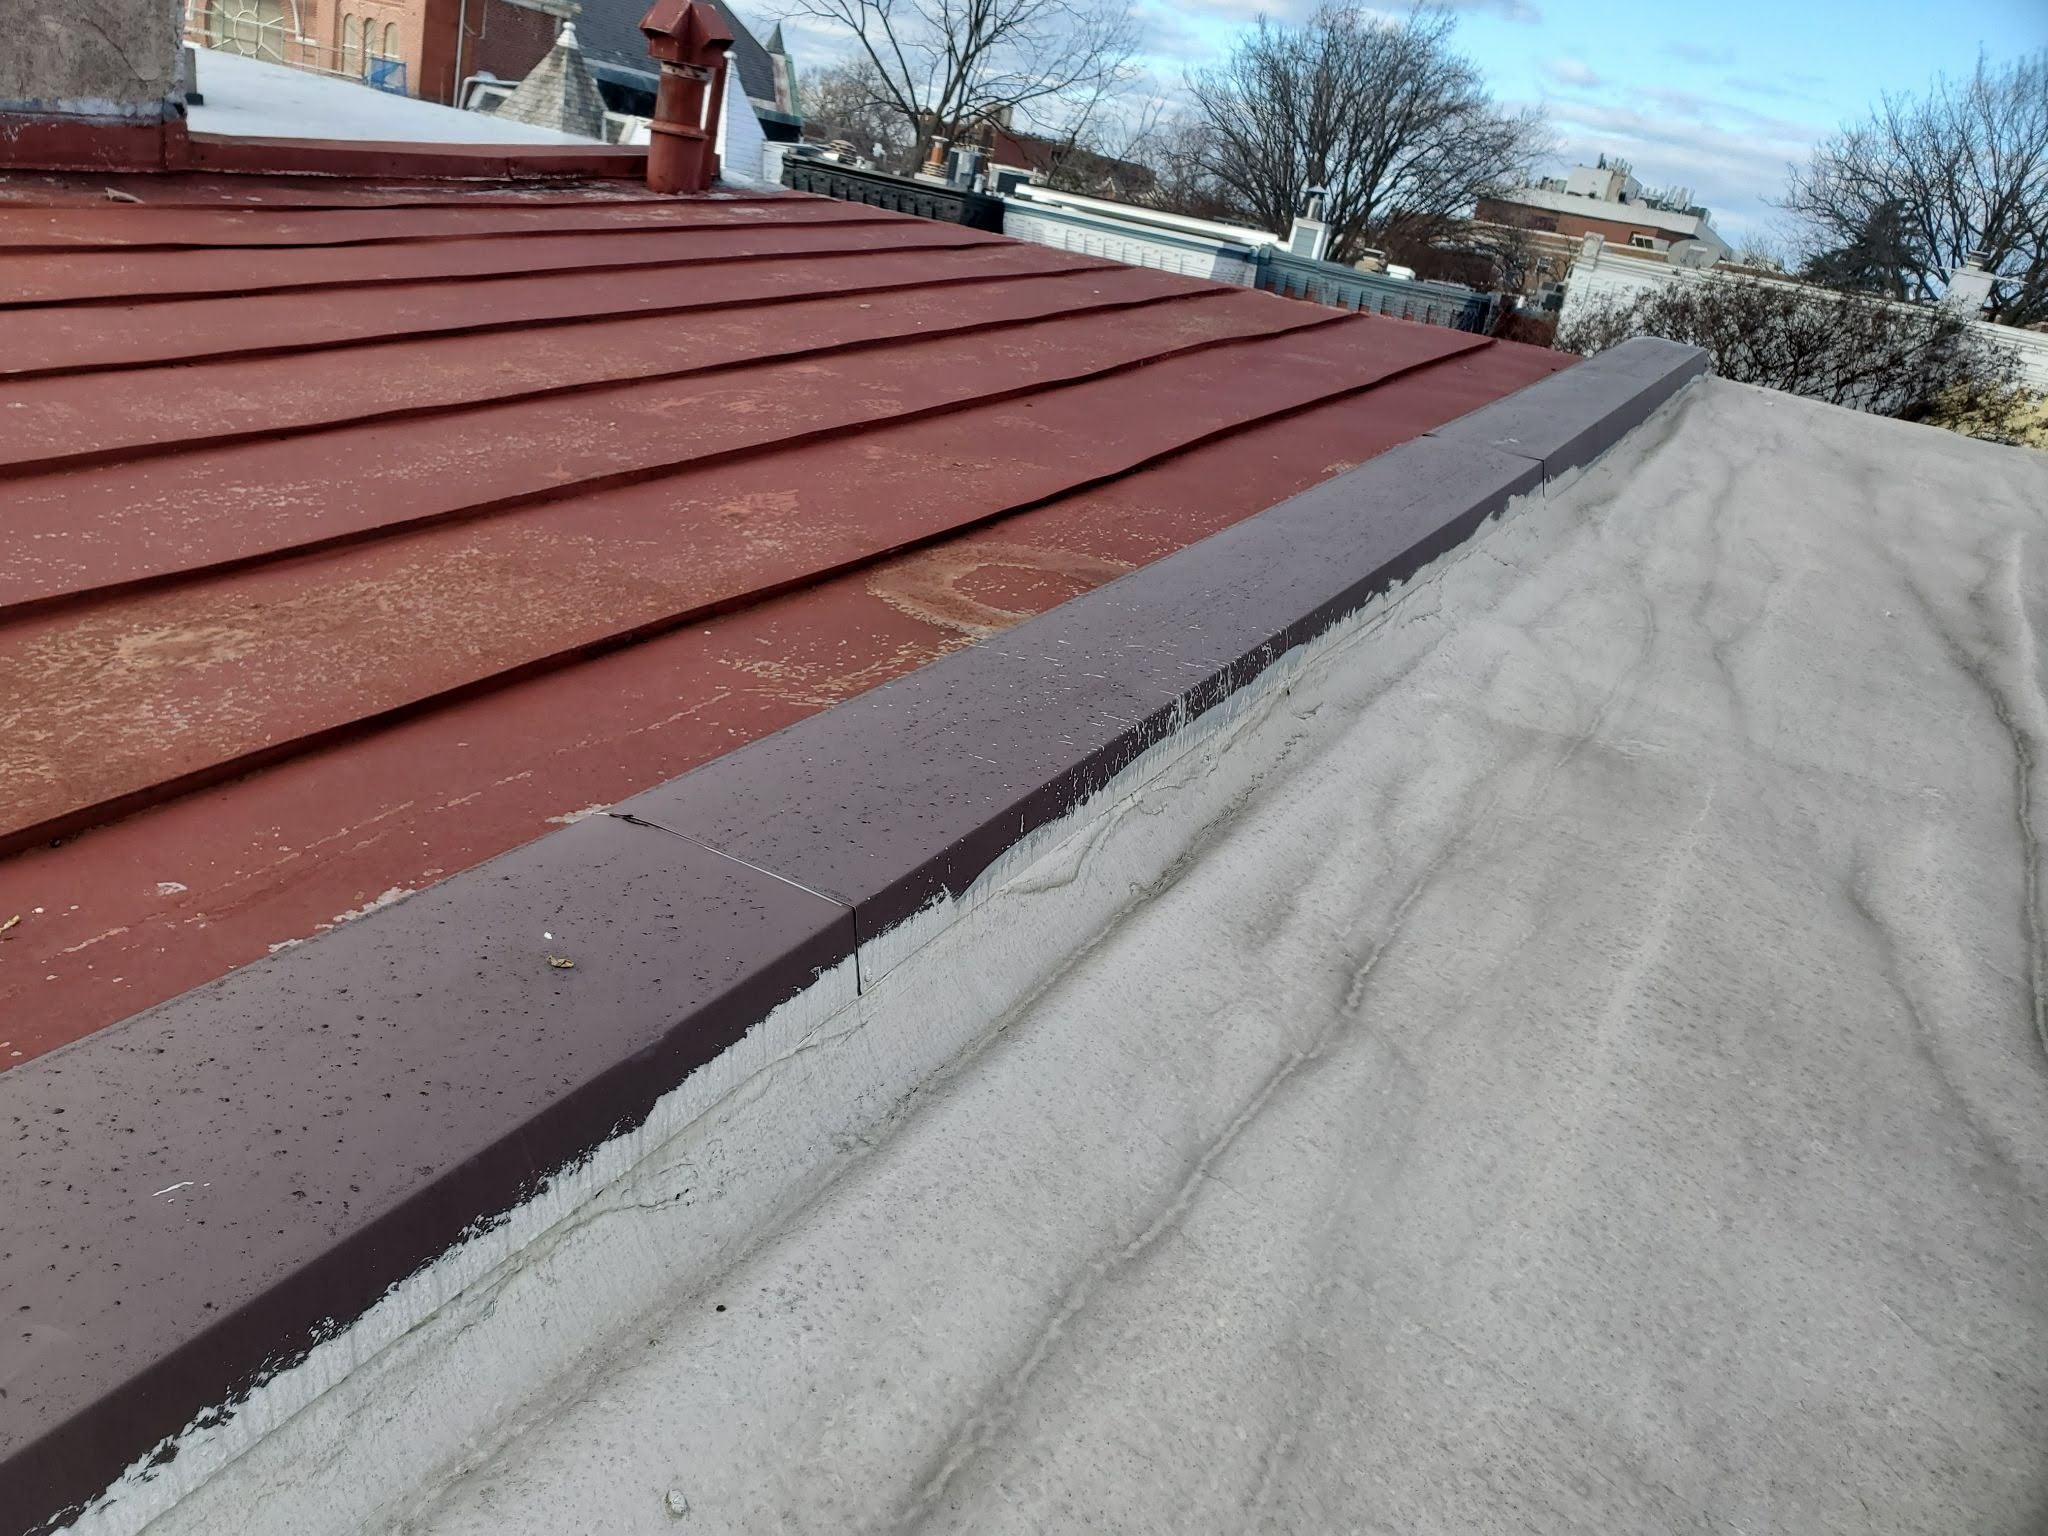
The roof shown in the picture below is similar in layout and configuration, but an even worse condition. The rear modified bitumen roof termination is completely loose and really unattached. It’s only really held in place because the remainder of the field of the membrane is somewhat secure through the initial installation and welding process.

A close-up view of this loose membrane is shown in the next picture below. Here you can see that there is not only a disconnection between the edge of the membrane and the substrate metal, but there’s even undulation where the modified bitumen membrane is loose and wavy. One of the biggest problems with this type of inadequate installation is that when the edge of the roof membrane is left loose, it’s susceptible to water entry through a variety of conditions such as wind driven rain and ice damming. Both wind driven rain and ice damming only occur during specific weather patterns.
During the heaviest storms during the hurricane seasons, even when there are not actual hurricanes happening, rains can both be heavy and simultaneously subject to high winds. During those conditions, water can enter underneath of the edge of the membrane and into the susceptible areas of the building. The material directly underneath most of low slope roof systems is a polyisocyanurate insulation board on top of an actual natural wood board.
In historic buildings, in most cases, these boards were 1x dimensional lumber. In cases where the roofs have been replaced and or built in more contemporary or modern times, it is generally a plywood sheathing which is an assembly of thin veneers of wood glued together with a phenol urea or similar type of adhesive under high pressure. These modern lumbers are particularly easily damaged by exposure to moisture and water.

This particular roof also appears to be a roof recover. It looks like the previous contractor laid the new roof on top of the old roof without removing the old roof prior to installation of the new roof. Technically, the building code allows that to be done one time; the building code specifically does not allow the top layer to be removed, even when there’s already two existing layers. Under those circumstances, when installing a new roof, instead of being allowed to just remove the newer layer of the roofing membrane in a case where there’s more than one existing membrane present, all must actually be removed.
The building codes are actually explicit about this. In general, building code doesn’t include much information, direction, or constraints for low slope roof installation. Instead, the building code directs most rules, limitations, and requirements, back to the manufacturers. Whether or not this approach is effective is debatable. It’s clear though that in the field, overall standards are very low and companies like ours that care about doing things right seem to be extremely rare.

The next picture below shows one of those areas of undulation. Where the peak of the wrinkle in the overlap is highest you can see there is a void where the membrane separates from the substrate roof deck and or underlayment insulation significantly, to the point that it would be easy for snow buildup or ice damming type precipitation to enter right into the unprotected parts of the building.
Also, at the same area, you can see another defect, unrelated to the roof installation itself, but at an adjacent and important connected system, the rooftop gutter is not flashed properly. The roof membrane terminates or is at least intended to terminate with a gravel stop at the rearmost part of the roof.
At least in this particular case, the gravel stop is present, but the gutter below the gravel stop has a gap which exposes the substrate fascia board. That substrate fascia board should be continuously covered with an extension of flashing that spans between the underside of the drip edge and over the top back edge of the gutter. Without that continuous flashing, water that builds up in the gutter can seep into the fascia board and cause rot and damage. In the worst cases, water can actually run around the fascia board back into the areas of the interior parts of the roof framing.

We recommend every building owner in DC who values the longevity of their roof (and their investments) and building use a contractor who values the simple and important principles of proper roof construction like Dupont Roofing DC. Learn more about our company and the proper techniques of working with roofing on historic buildings in Washington DC here on our blog at DupontRoofingDC.com, and you can call us at (202) 840-8698 and email us at dupontroofingdc@gmail.com. We are happy to help and at least talk through options.